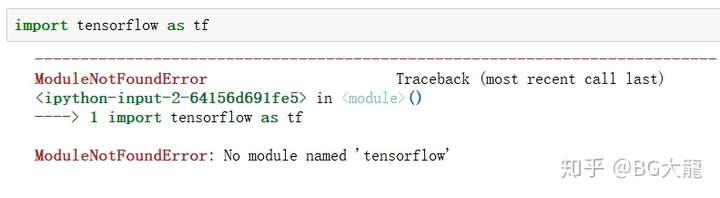
直接启动jupyter notebook,在jupyter notebook中输入命令,如import tensorflow as tf并不能调用tensorflow的开发包。
这是因为:如果此时直接启动jupyter,此时的jupyter是基于整个Anaconda的python,而不是对应的tensorflow虚拟环境,因此进入此虚拟环境后需要重新安装jupyter notebook
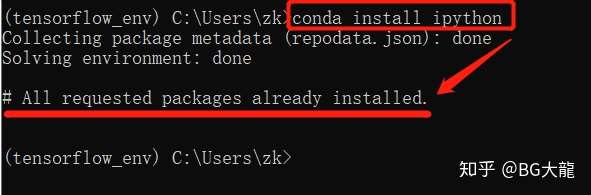
在TensorFlow的虚拟环境(tensorflow_env)安装jupyter
激活环境TensorFlow
在cmd中输入:conda activate tensorflow_env

安装ipython
在cmd中输入:conda install ipython
安装jupyter
在cmd中输入:conda install jupyter
这里看到有些人会出现以下问题,当然也许你不会出现也许你会出现。

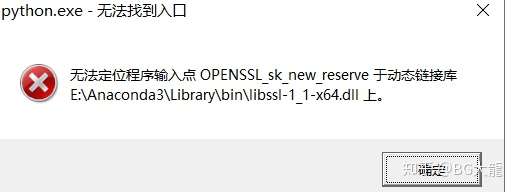
这个问题是“无法定位程序的输入点 xxx 于动态链接库 xxx 上”,我们来解决一下。
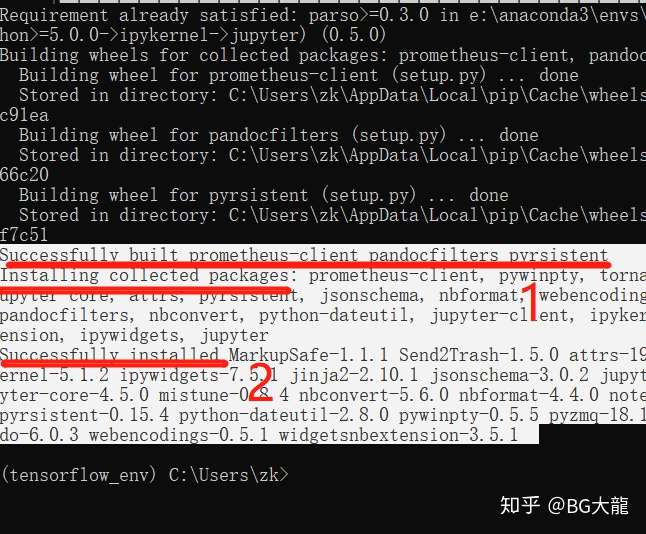
在cmd中输入:pip install jupyter (pip是 Python 包管理工具,该工具提供了对Python 包的查找、下载、安装、卸载的功能。) 出现好多下载列表……慢慢等待进度条

直到出现2个“Successfully……”,说明这个过程结束
安装python kernel for Tensorflow:
在cmd中输入:ipython kernelspec install-self --user
看到类似如下结果 Installed kernelspec python3 in C: 说明安装成功

验证是否好使
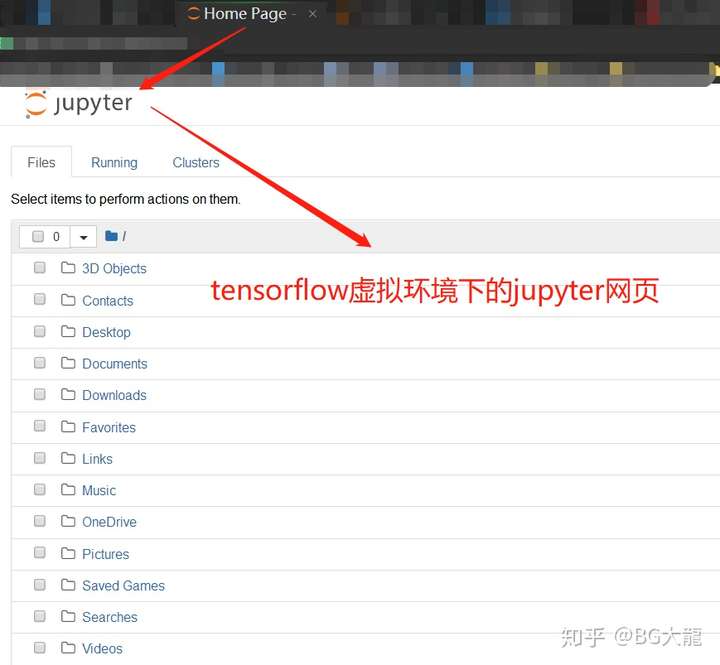
此时在tensorflow虚拟环境下,输入:jupyter notebook 会显示很多信息,不用管它
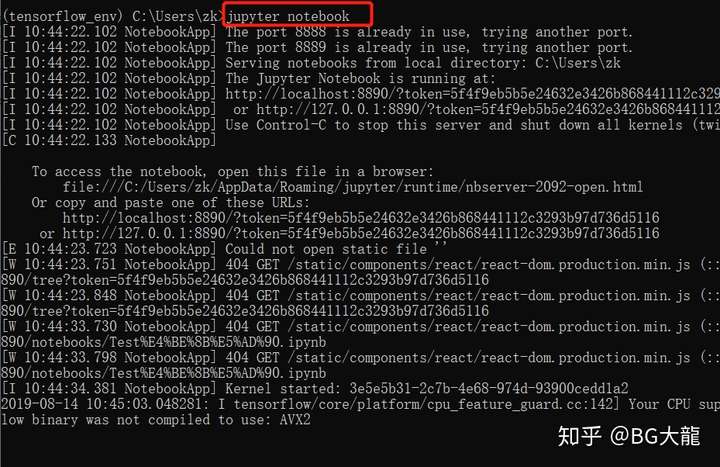
然后自动跳转到tensorflow虚拟环境下的jupyter网页
跑一下测试代码
import tensorflow as tf hello = tf.constant('hello,TensorFlow') sess = tf.Session() print(sess.run(hello))

如果你和我有一样的结果,说明你成功了!!!
其他问题
我在第一次安装时,到了最后一部运行代码的时候,jupyter notebook切换新环境后,new新环境的notebook,服务器端会显示Bad file descriptor (D:_1605919615529.cpp:100) 然后就断掉jupyter notebook 服务。
正常情况下Jupyter Notebook是这样显示的:

我的情况:

报错信息可能为:

也有可能是:
Bad address: C:.cpp:100
原因
当你安装jupyterlab 或者jupyter notebook的时候,会自动安装ipykernel, 然后自动安装了高版本的pyzmq.
解决方法
此问题是pyzmq版本问题,卸载pyzmq 22.0.2,执行 pip install pyzmq==19.0.2 安装pyzmq 19.0.2即可
1 | 卸载:pip uninstall pyzmq |
这个时候还要稍等一会,不要像我一样马上写代码然后发现还是运行不了!!!